Table of Contents
This article provides comprehensive analysis of the Mac Cleanup Pro malware issue, including the infection’s behavioral quirks and ways to remove it from Mac.
What is the Mac Cleanup Pro virus?
One of the things the cyber world has in common with the world around us is that there are genuine entities and copycats that might be problematic to identify as such. In terms of Mac software, the niche of optimization and security apps is gaining traction these days, and so is the cluster of rogue programs that only pretend to be helpful. Mac Cleanup Pro falls under the scareware category because it mimics system tune-up features without actually doing anything the users will ever appreciate. It comes as a nifty-looking Mac utility that claims to be able to find common performance issues and easily repair them to boost the performance of the host machine. While the first impression about this application could be okay based on its GUI design and the speed at which it runs its scans, the tactic it employs ultimately proves this opinion wrong.

The Mac Cleanup Pro virus mostly arrives with bundles of freeware apps that aren’t necessarily junk but make the rounds as part of software packages. The fundamental issue with this distribution technique is that the “undercover” items accompanying the main one may be malicious, and the setup clients often don’t allow the users to get the big picture of what exactly is being installed as an extra. For instance, you may be happy to finally find some new free-of-charge media player on a software download portal you aren’t familiar with, but the joy vanishes once you realize that the default installation mode has pulled in Mac Cleanup Pro without letting you know. One more technique used to push this baddie resembles tech support scams, where a website suddenly pops up telling you that your MacBook Air/Pro or iMac is badly infested with threats and recommending you to downloading the “fix”, which is a rogue app in disguise.
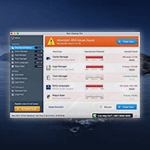
Once inside a Mac, the fishy utility in question will instantly draw all of your attention by starting a spoof system scan. It supposedly checks the computer for redundant files, such as all forms of cache, duplicates, large objects, unused files, logs you no longer need, and the like. When through with the checkup, the pest displays a report where nearly all of the above areas will be flagged red due to the allegedly high improvement potential. It will purport to have detected hundreds of unnecessary objects which, if deleted, will free up gigabytes of disk space. Being able to release so much memory is certainly a tempting option, but the pitfall is that most of these issues are made-up to hoodwink you into proceeding to the next step. It boils down to upgrading your subscription – in other words, Mac Cleanup Pro will instruct you to purchase its licensed copy otherwise the problems cannot be addressed.
If you think you can simply disregard these scan reports and follow-up popup reminders about system slowdown and possibly even viruses, you might be missing the point. This scareware will be gradually escalating the pressure through deliberate Mac performance deterioration, more alerts, and browser-related brainwashing. Speaking of the latter, the infection is known to interfere with DNS settings and may add a potentially harmful extension to the victim’s default browser, whether it’s Safari, Chrome or Firefox on Mac. This way, it causes the web traffic to be forwarded to misleading sites that may say “Your Mac is infected with 3 viruses” or include similarly scary warnings. The goal is to make you download the “featured” tool, which is the malware under scrutiny. Consequently, the attack gets more obnoxious over time, and it won’t discontinue unless Mac Cleanup Pro is completely removed.
Automatic removal of Mac Cleanup Pro virus
If this threat has infected your Mac, the most effective way to get rid of it is to use an automatic cleaning tool. The main benefit of taking this route is that the security application will accurately pinpoint and remove all the malicious files, including hidden components that could be difficult to find and erase manually. MacBooster is an award-winning solution that makes this process easy and fast. Follow the steps below to make the most of its malware removal and optimization power:
1. Download and install MacBooster onto your Mac.Download Mac Cleanup Pro virus removal tool
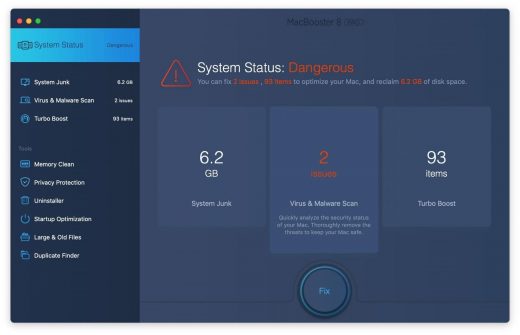
2. Open the tool and click on the Scan button on its home screen called System Status. The application will check your Mac for viruses and malware, memory issues, and junk files.

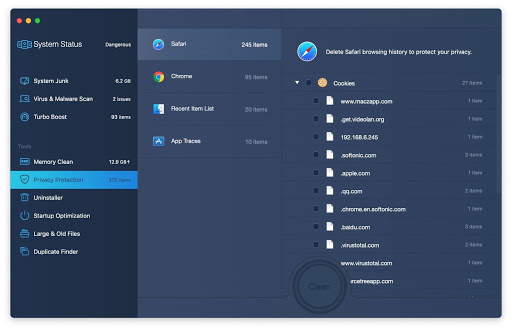
 4. To address the after-effects of Mac Cleanup Pro virus activity in the web browser, select the Privacy Protection feature in MacBooster sidebar, choose your default browser, and click on the
Clean button at the bottom. This will delete unwanted cookies and other items affecting the browser behavior.
4. To address the after-effects of Mac Cleanup Pro virus activity in the web browser, select the Privacy Protection feature in MacBooster sidebar, choose your default browser, and click on the
Clean button at the bottom. This will delete unwanted cookies and other items affecting the browser behavior.
The Mac Cleanup Pro virus shouldn’t be messing around with your Mac any longer. Be advised, though, that your default browser may still be redirected to dubious pages until you rectify its settings (the reset procedure will be described further down).
Mac Cleanup Pro redirect virus manual removal from Mac
The gist of this section is to walk you through the process of deleting all non-obfuscated files related to the Mac Cleanup Pro virus Mac. It’s best to perform the cleanup in the order specified below.
-
Click the Go icon in Finder and select Utilities on the list

-
Find and select the Activity Monitor under Utilities
-
In the Activity Monitor, scrutinize the running processes for one that consumes lots of CPU and looks suspicious. Once the likely baddie is found, select it and click the Quit Process icon. An additional
confirmation dialog will pop up – click Force Quit on it
-
Now, go to Applications under the Go menu
-
What you need to do is scroll down the list of installed apps in search of the malicious item. It could be a program with a gibberish name or one that ended up on your Mac beyond your awareness
-
Go to System Preferences as shown below
-
Select Accounts, then Login Items. You will see all the apps that run as part of the Mac startup process. Find the infection and remove it from the list by means of the “minus” icon


Now that you have suppressed the virus proper, you need to fix the problem in Safari. The browser defaults continue to be set to Mac Cleanup Pro, therefore the repair requires some manual configuration tweaking.
Stop browser redirects to pages promoting Mac Cleanup Pro
The optimal troubleshooting method boils down to resetting the browser, which will undo all changes made by the infection or any third-party plugin without your permission. Here’s how to do it:
Reset Safari to its defaults
-
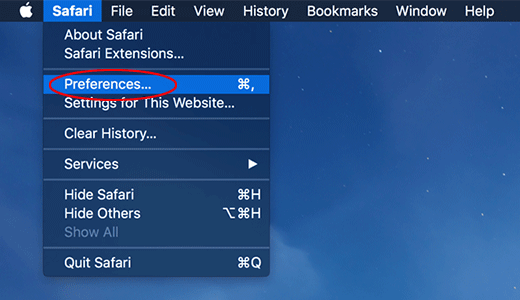
Go to Safari menu bar and select Preferences again on the drop-down list
-
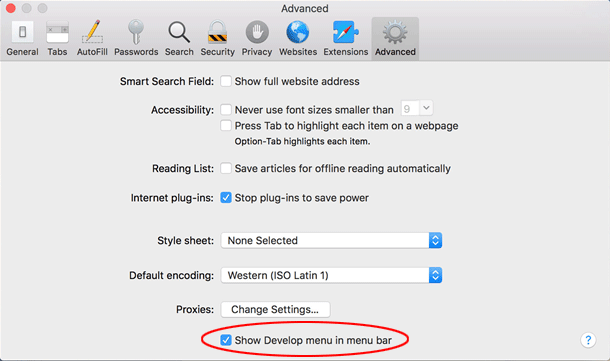
Go to Advanced tab and enable the option that says Show Develop menu in menu bar
-
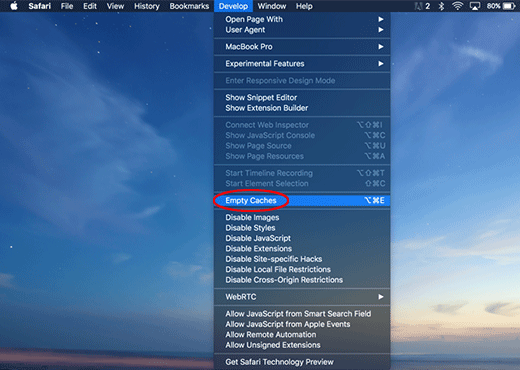
Now you will see the extra Develop menu in your Safari menu bar. Click it and select Empty Caches as shown below
-
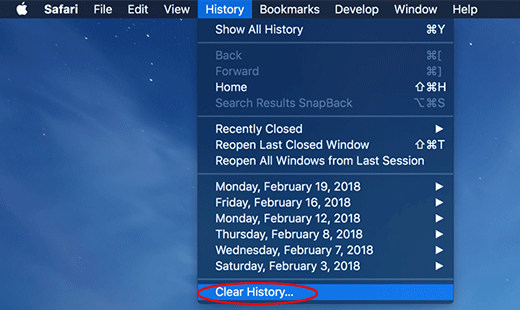
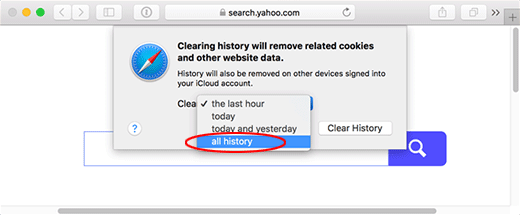
Do some test browsing to see if things are okay now and whether the malware is gone. If the issue is still there, you may need to additionally clear your browsing history in Safari. In Safari menu bar, select
History and click Clear History
-
The browser will display a dialog so that you can select the required period you would like to clear history for. Select all history on the list and click the Clear History button
-
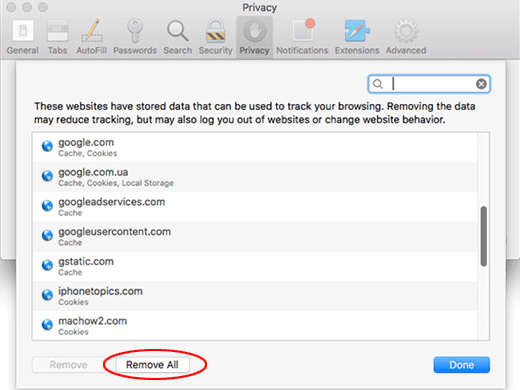
In case Safari is still acting up due to malware interference, there is one more thing you can try. Once again, go to Preferences from the Safari menu bar and select the Privacy tab
this time. Click Manage Website Data
-
When Safari generates a full list of sites that have stored your browsing data, go ahead and click Remove All
- Confirm by hitting the Done button.

Reset Google Chrome
- Click More (⁝ icon) at the top right part of the Chrome window and select Settings
- Find the Advanced section on the Settings screen and expand it
-
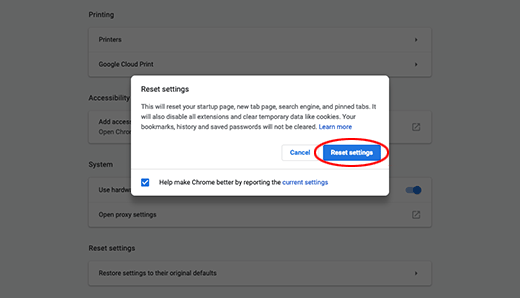
Locate the Reset settings subsection and click Restore settings to their original defaults
- Google Chrome will display a popup dialog asking you to confirm the reset. Click the Reset settings button on it. Now, restart the browser and ascertain that the problem has been fixed.
Refresh Mozilla Firefox
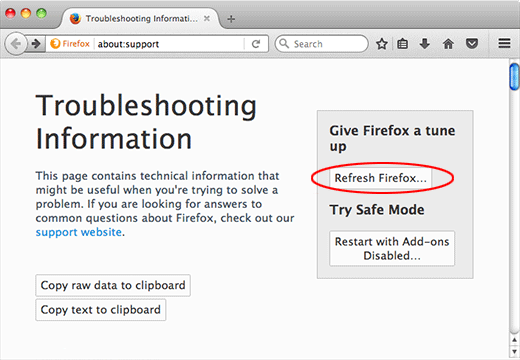
- Go to Help -> Troubleshooting Information, or type about:support in the Firefox URL bar
-
Once the Troubleshooting Information screen appears, find and click the Refresh Firefox button as shown
- Confirm the browser refresh on a dialog that will appear. Restart Firefox and check it for signs of malware tampering.