Table of Contents
This article delves deep into the anatomy of Critical Virus Alert pop-up scam, its modus operandi, and how users can protect themselves.
What is the Critical Virus Alert pop-up scam?
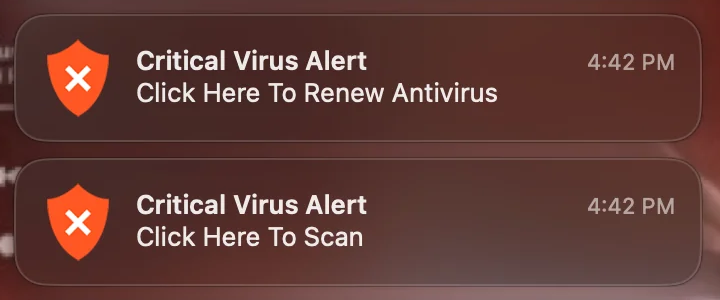
The Critical Virus Alert scam is a classic example of this new wave of threats. It starts with a browser redirect, often coupled with social engineering tactics. The endgame? To flood the user’s Mac desktop with pop-up warnings, urging them to click on a link that supposedly scans their system for threats.
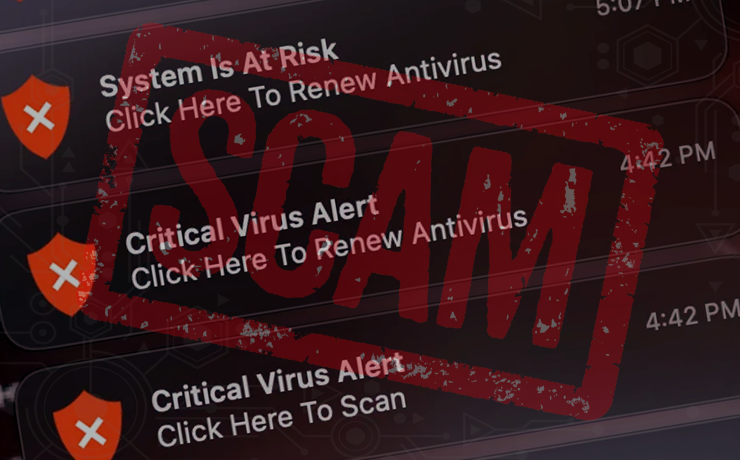
The pop-up notifications associated with this scam are hard to miss. Positioned prominently on the right-hand side of a Mac’s desktop, they flash messages like “Critical Virus Alert. Click Here To Scan.” To make them appear more legitimate, they often feature a shield icon. Clicking on these notifications redirects users to fraudulent web pages that either attempt to extract payment for cleaning non-existent infections or pave the way for more malicious malware through drive-by downloads.
Moreover, these alerts are often accompanied by other equally alarming notifications, such as:
- “System is infected! Click here to scan.”
- “System Is At Risk. Click Here To Renew Antivirus.”
- “Viruses Found (3). Click Here To Scan.”
The goal is clear: instill fear and urgency, pushing the user to take action.
While the scam might seem sophisticated, there are telltale signs that can help users identify it. For instance, some alerts may contain grammatical errors or exaggerate the severity of the purported issues. The key is to remain vigilant and treat permission requests on unfamiliar websites with skepticism.
The scam often begins when a user clicks on a search engine result that redirects to a dubious page. To view the content, the user might be prompted to allow notifications, sometimes under the guise of human verification. Granting such permissions is a grave mistake, as it allows the malicious website to display web push notifications, the very medium the Critical Virus Alert scam leverages.
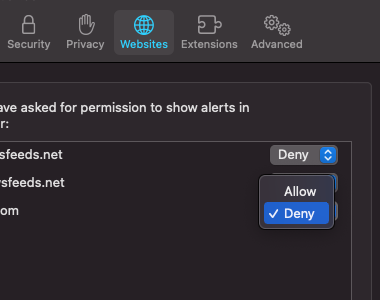
If a user falls prey to this scam, the first line of defense is the browser settings. For instance, in Safari, one can navigate to Preferences, click on the Websites tab, scroll down to Notifications, and ensure that any unfamiliar websites are set to “Deny”.
However, if the user has extensively interacted with the scam alerts and related landing pages, it’s prudent to check the Mac for related malware and misconfigurations. Manual removal steps involve navigating through various system folders and removing suspicious files. Alternatively, tools like MacBooster can automate the malware detection and removal process.
Automatic removal of Critical Virus Alert pop-up scam from Mac
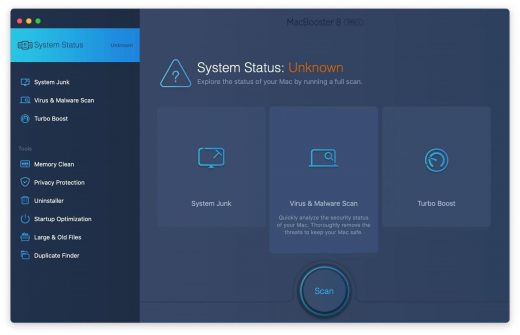
If this threat has infected your Mac, the most effective way to get rid of it is to use an automatic cleaning tool. The main benefit of taking this route is that the security application will accurately pinpoint and remove all the malicious files, including hidden components that could be difficult to find and erase manually. MacBooster is an award-winning solution that makes this process easy and fast. Follow the steps below to make the most of its malware removal and optimization power:
1. Download and install MacBooster onto your Mac.Download Critical Virus Alert pop-up virus removal tool
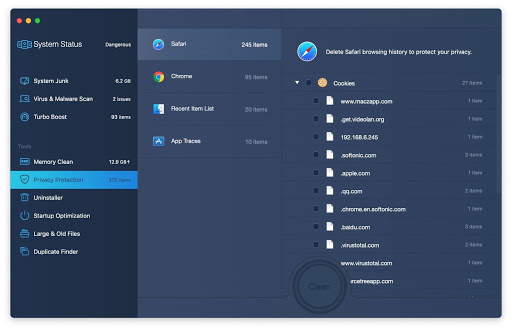
2. Open the tool and click on the Scan button on its home screen called System Status. The application will check your Mac for viruses and malware, memory issues, and junk files. 3. Once the scan is completed, MacBooster will display a report listing all the security and performance problems detected on your computer. Click on the Fix button to remove the malicious items and fine-tune your Mac’s performance.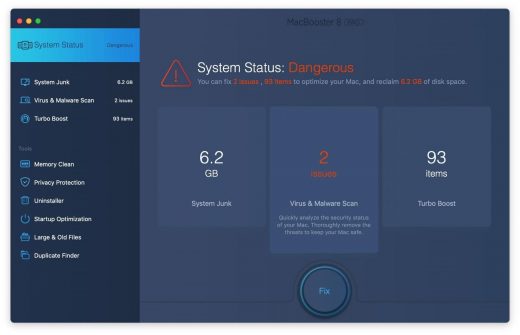 4. To address the after-effects of Critical Virus Alert pop-up virus activity in the web browser, select the Privacy Protection feature in MacBooster sidebar, choose your default browser, and click on the
Clean button at the bottom. This will delete unwanted cookies and other items affecting the browser behavior.
The Critical Virus Alert pop-up virus shouldn’t be messing around with your Mac any longer. Be advised, though, that your default browser may still be redirected to dubious pages until you rectify its settings (the reset procedure will be described further down).
Critical Virus Alert pop-up manual removal from Mac
The gist of this section is to walk you through the process of deleting all non-obfuscated files related to the Critical Virus Alert pop-up virus Mac. It’s best to perform the cleanup in the order specified below.
-
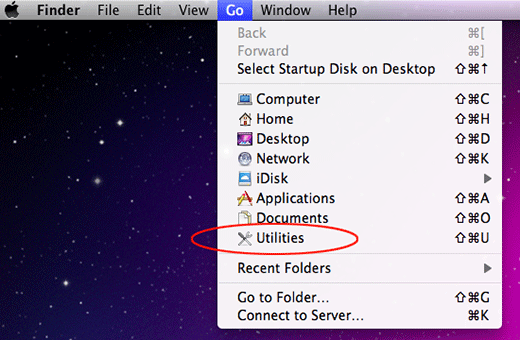
Click the Go icon in Finder and select Utilities on the list

-
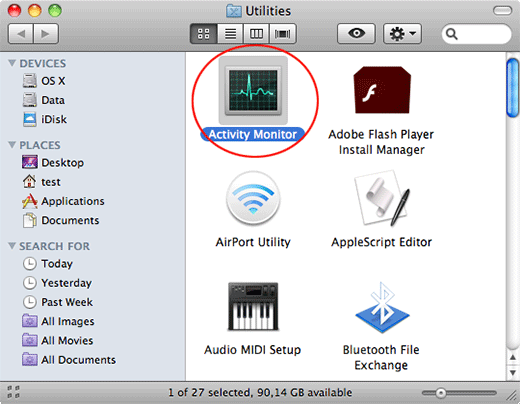
Find and select the Activity Monitor under Utilities

-
In the Activity Monitor, scrutinize the running processes for one that consumes lots of CPU and looks suspicious. Once the likely baddie is found, select it and click the Quit Process icon. An additional
confirmation dialog will pop up – click Force Quit on it

-
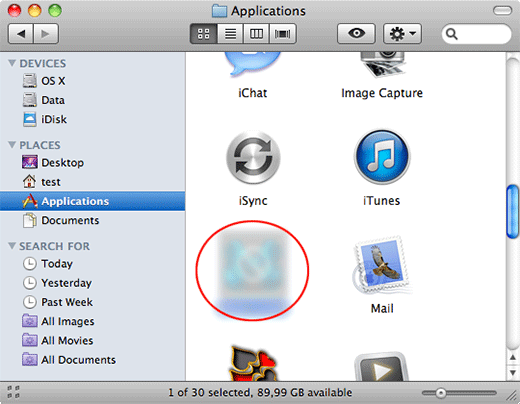
Now, go to Applications under the Go menu

-
What you need to do is scroll down the list of installed apps in search of the malicious item. It could be a program with a gibberish name or one that ended up on your Mac beyond your awareness

-
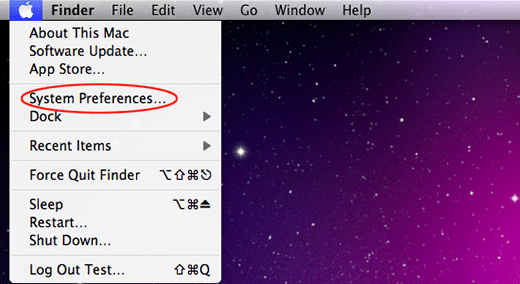
Go to System Preferences as shown below

-
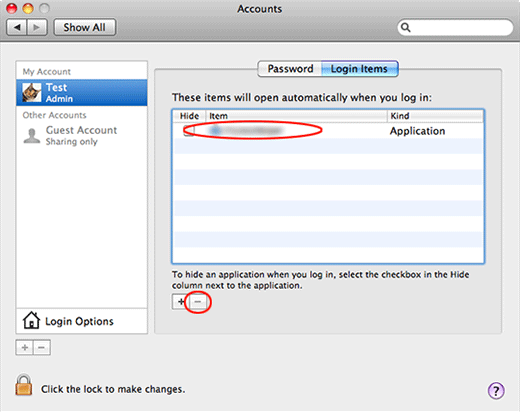
Select Accounts, then Login Items. You will see all the apps that run as part of the Mac startup process. Find the infection and remove it from the list by means of the “minus” icon

Now that you have suppressed the virus proper, you need to fix the problem in Safari. The browser defaults continue to be set to Critical Virus Alert pop-up, therefore the repair requires some manual configuration tweaking.
Remove Critical Virus Alert scam from affected browser on Mac
The optimal troubleshooting method boils down to resetting the browser, which will undo all changes made by the infection or any third-party plugin without your permission. Here’s how to do it:
Reset Safari to its defaults
-
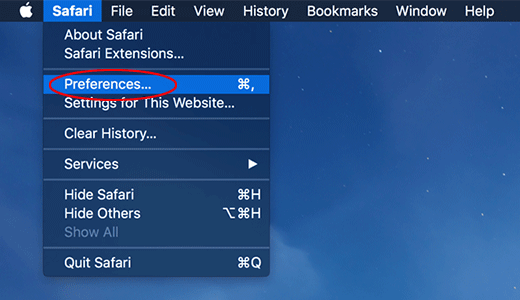
Go to Safari menu bar and select Preferences again on the drop-down list

-
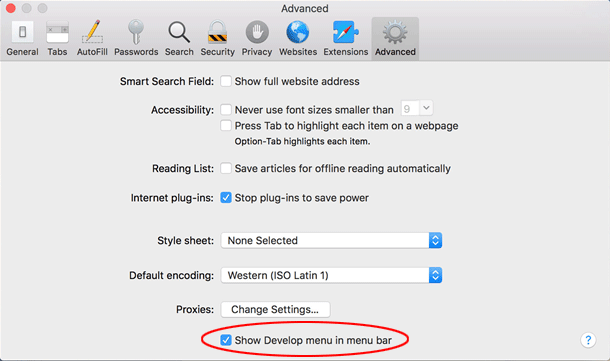
Go to Advanced tab and enable the option that says Show Develop menu in menu bar

-
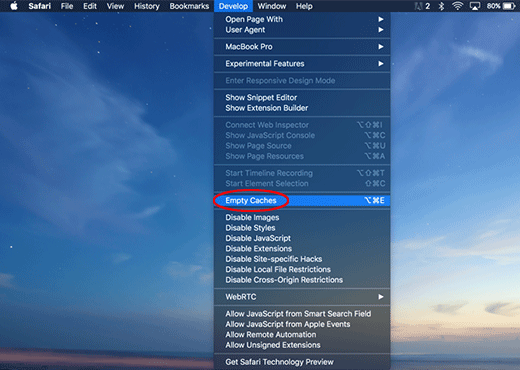
Now you will see the extra Develop menu in your Safari menu bar. Click it and select Empty Caches as shown below

-
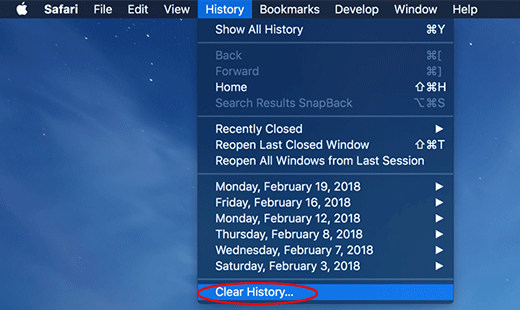
Do some test browsing to see if things are okay now and whether the malware is gone. If the issue is still there, you may need to additionally clear your browsing history in Safari. In Safari menu bar, select
History and click Clear History

-
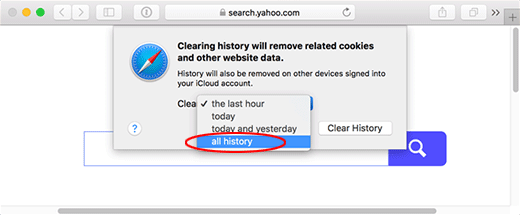
The browser will display a dialog so that you can select the required period you would like to clear history for. Select all history on the list and click the Clear History button

-
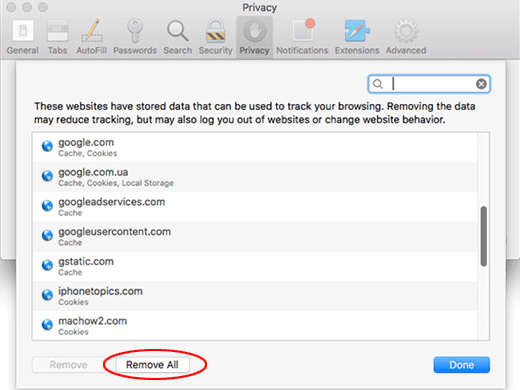
In case Safari is still acting up due to malware interference, there is one more thing you can try. Once again, go to Preferences from the Safari menu bar and select the Privacy tab
this time. Click Manage Website Data

-
When Safari generates a full list of sites that have stored your browsing data, go ahead and click Remove All

- Confirm by hitting the Done button.
Reset Google Chrome
- Click More (⁝ icon) at the top right part of the Chrome window and select Settings
- Find the Advanced section on the Settings screen and expand it
-
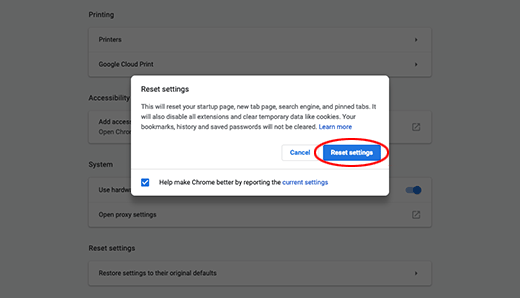
Locate the Reset settings subsection and click Restore settings to their original defaults

- Google Chrome will display a popup dialog asking you to confirm the reset. Click the Reset settings button on it. Now, restart the browser and ascertain that the problem has been fixed.
Refresh Mozilla Firefox
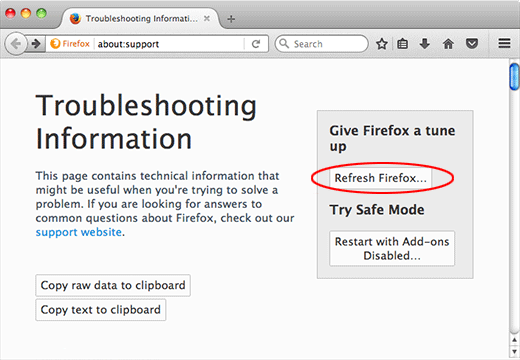
- Go to Help -> Troubleshooting Information, or type about:support in the Firefox URL bar
-
Once the Troubleshooting Information screen appears, find and click the Refresh Firefox button as shown

- Confirm the browser refresh on a dialog that will appear. Restart Firefox and check it for signs of malware tampering.

